Zachary A Porter
Zachary A Porter
This project was built for my school's 9th grade "Winterfest" event. Winterfest is a day dedicated to the science classes of the school. In preparation for this day, the 8th grade class builds balsa wood bridges, 9th grade builds catapults, 10th grade teaches classes about math / applications of science, 11th grade performs a chemistry showcase, and the 12th grade class shoots rockets. One of the best aspects of The Northwest School is that they allow students to be creative. The project I was assigned was to build a "catapult", although
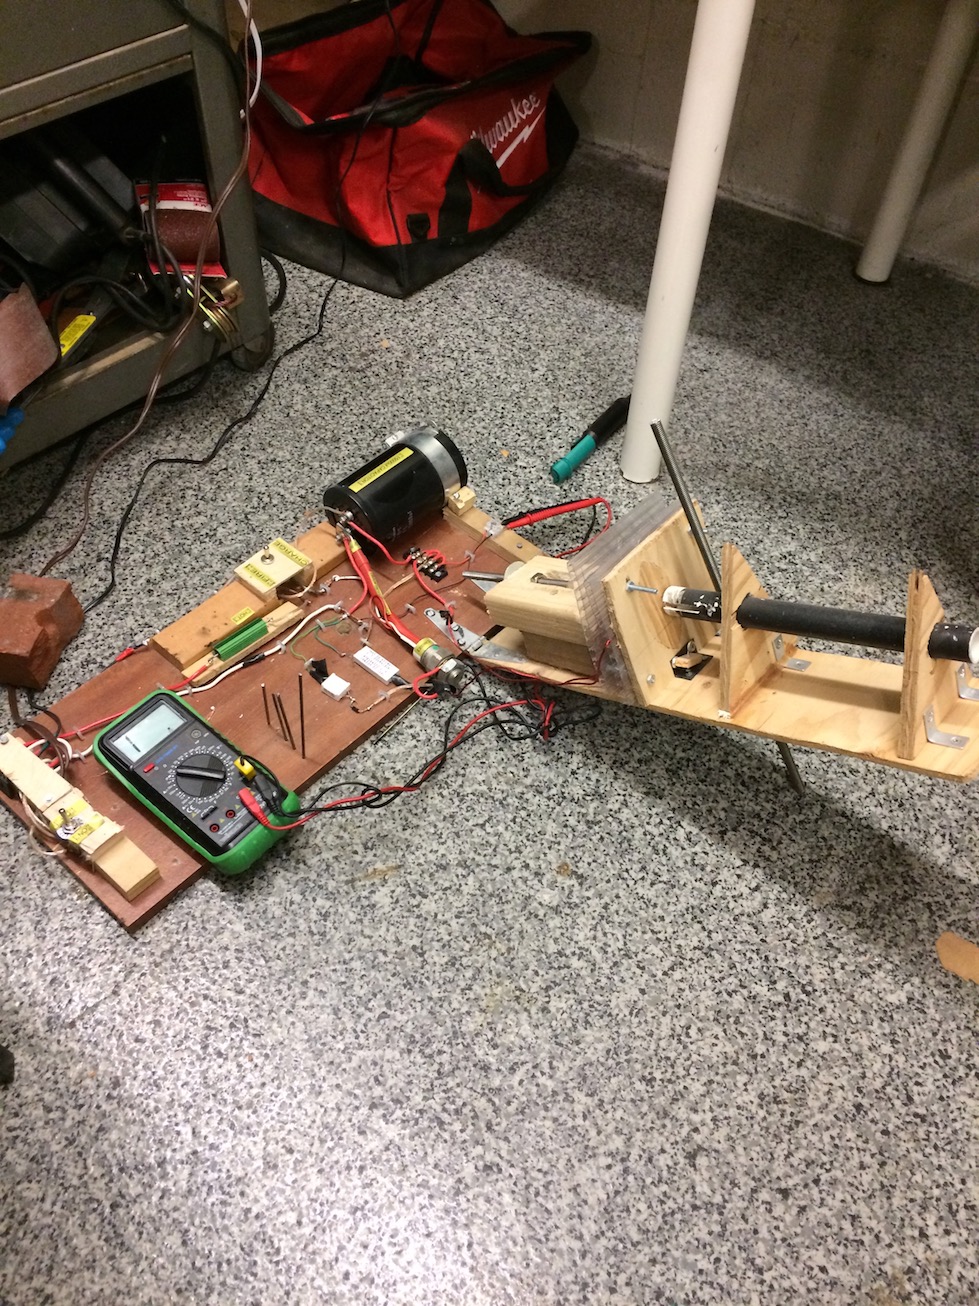
any projectile launching machine satisfied the requirements. The device had to launch a rubber ball 5 meters and land within a 15cm-radius target. Some people built trebuchets, some built ballistas, while others built pressurized air cannons. I built a coilgun.
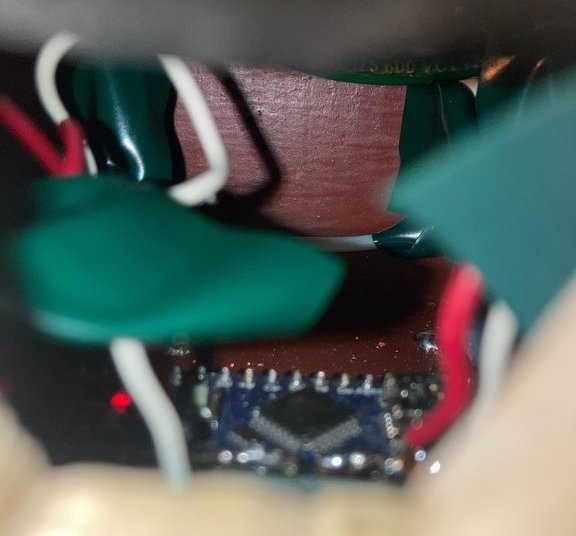
The idea behind a coilgun is that when current flows through a coil it produces an electromagnetic field. If you were to put a metal slug pointing towards the
coil, upon discharge of a capacitor through the coil, the projectile would be launched through an opening in the coil to then hit something. I chose to build a coilgun not because it would be either the most accurate or precise, but because it would be super cool and entirely unique. Though I spent many hours running the calculations to build the coil (gauges, width, height, inner and outer diameter, distance to coil entrance, resistances, capacitor selection etc..), I sadly forgot to document it properly. I did the math, got the numbers, and built the project. I have now learned that recording my calculations is a fundamental part of the scientific method and will do better in the future. At one point I may revisit this and show the math that was done. I do happen to recall the measured efficiency being ~1.5%, which is typical of most coilgun designs.
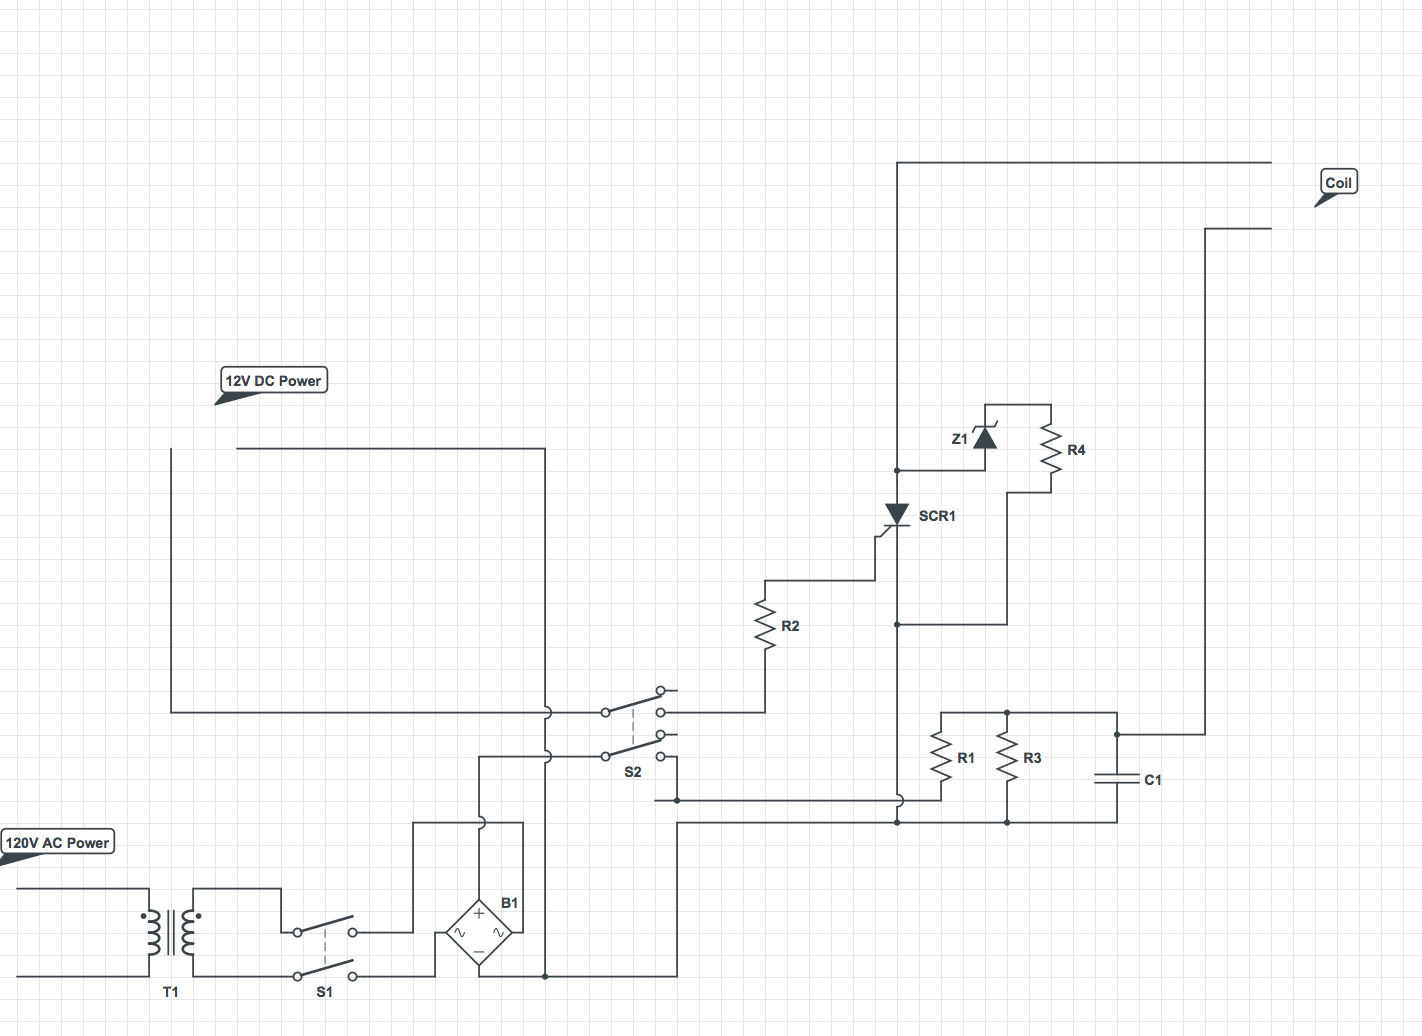
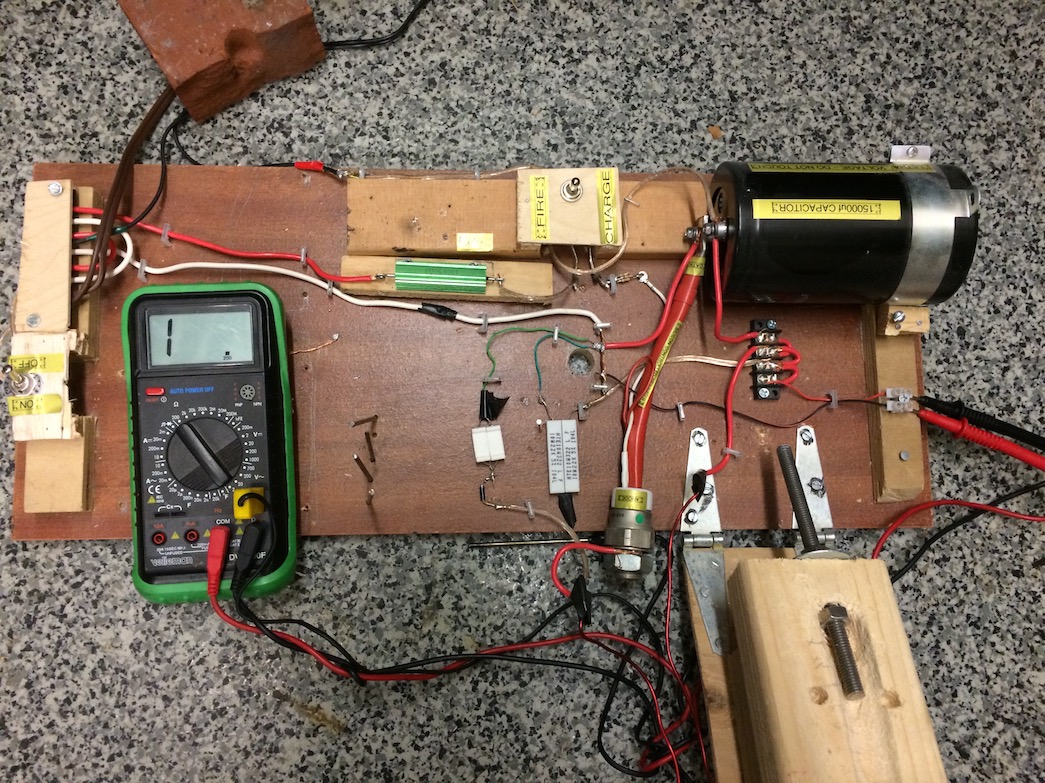
T1 - Transformer to either 240VAC or just left at 120VAC depending on the use at the time (240 = A lot more power)
S1 - DPST Power switch
S2 - DPDT Charge / Fire Switch
C1 - 15000uf 350V capacitor
R1 - 50 ohm charging resistor
R2 - 20 ohm voltage altering resistor to protect the scr
R3 - 44k ohm passive discharge resistor
R4 - 7.5k ohm resistor
SCR1 - Standard SCR, rated for 275A, just in case I do something stupid
Z1 - Zener diode to protect SCR
B1 - Bridge Rectifier

All content on this page belongs to Zachary Porter. You may use, reproduce, or modify anything from this website, provided that you give credit to zackporter.com in your usage.